At the beginning of the lesson we had to make sure we were sitting
at the correct computer containing our footage from last week on it. We were
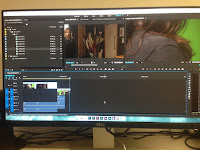
shown how to access the program Adobe Premier Plus that we used. This program was separated into different sections, on the left
hand side of the program you have the project window which contains all the
footage on the camera in group 3 (our group). Next to this we have two video
screens which we used in further editing, then finally we have a timeline at the
bottom going from left to right. We have V1, V2 and V3 which are the video
channels and we also have A1, A2 and A3 which are audio channels.

Showing the whole screen of Adobe Premier Pro.
We learnt about two different film making terms in this lesson.
The first one is called ‘Bins’.
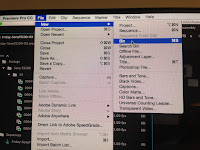
Bins are folders in video editing packages, if you need to make a new folder you go to ‘file, new, bin’.
The first one is called ‘Bins’.
Bins are folders in video editing packages, if you need to make a new folder you go to ‘file, new, bin’.

The second film making term we learnt was called ‘Rushes’.
The footage that we shot last week was taken exactly off the camera with no editing involved and put directly onto the computer. To watch these rushes you must double click on the icon, this then populates a screen in the middle next to the project window. You can then press the play button and it will begin to play the footage, or you can press the space bar, there is also a play back head, which allows us to scroll backwards and forwards through the footage.
The footage that we shot last week was taken exactly off the camera with no editing involved and put directly onto the computer. To watch these rushes you must double click on the icon, this then populates a screen in the middle next to the project window. You can then press the play button and it will begin to play the footage, or you can press the space bar, there is also a play back head, which allows us to scroll backwards and forwards through the footage.
We then had to apply all this information that was given to us to
our own projects in our groups. We first loaded up our project and dug through
the bins until we found our own rushes and start looking through them.
We then learnt that when working on editing we need to do
something called log shot, this means going through the footage and finding
footage you are definitely going to use and placing it somewhere safe so you
know exactly where to find it again. This is done because you always need a back
up in case anything goes wrong and you always have your rushes safe so you can
always go back to the source and carry along from point zero. To do this you
right click on the footage and click duplicate and re-name it to something you
would remember and you then make a new bin and call it ‘log’ and you then drag
that footage into the log bin.
There are two main principles of cutting that we used in this
lesson, and only two major tools.
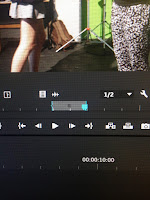
The first principal is called 'last moment in' and 'first moment out', this forces you to keep just the interesting, important things on the screen. Last moment in means that you find the moment just as the action happens, so when you have decided where the beginning of the clip is going to be you click the button ‘I’ for in and this places a blue marker down on the footage and when is gets to the end of where you want footage to stop you click ‘o’ for out.
The first principal is called 'last moment in' and 'first moment out', this forces you to keep just the interesting, important things on the screen. Last moment in means that you find the moment just as the action happens, so when you have decided where the beginning of the clip is going to be you click the button ‘I’ for in and this places a blue marker down on the footage and when is gets to the end of where you want footage to stop you click ‘o’ for out.

This image shows what happens when you use 'i' for in and 'o' for
out.

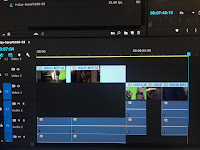
You the click on this picture and drag it down onto the timeline,
to enlarge the clip so it is easier to edit you zoom into the clip on the
timeline by pressing the ‘+’ button and pressing ‘-‘ to zoom out.
This image shows the footage on the timeline. I noticed that when placing this footage into the timeline a second window
was populated with the footage in the timeline.
The second principle is to cut a movement. This is when you cut the footage to match the next footage so the transition between shots is smooth. You repeat the process of ‘I’ for in and ‘o’ for out and dragging it down onto the timeline as before. Premier will play which ever video is on the top, so if you were to play the footage back it would be a continuous footage of all the cut shots merged into one long piece of footage. You continue this process until you have a whole completed scene.
The second principle is to cut a movement. This is when you cut the footage to match the next footage so the transition between shots is smooth. You repeat the process of ‘I’ for in and ‘o’ for out and dragging it down onto the timeline as before. Premier will play which ever video is on the top, so if you were to play the footage back it would be a continuous footage of all the cut shots merged into one long piece of footage. You continue this process until you have a whole completed scene.
I really enjoyed this session this week because I learnt the
basics of how to cut and merge footage together.
No comments:
Post a Comment